How to Successfully Renovate a Bathroom
Are you looking to spruce up your outdated bathroom? With the right tools, materials, and some elbow grease, you can breathe new life into the area and make it even more enjoyable. In this guide, we’ll provide step-by-step instructions on how to renovate a bathroom efficiently and effectively. Plan a Design Before you begin the remodeling process, it’s important to have a plan and design in mind. Consider your budget and the materials you want to use for the job. Set realistic expectations for yourself; if there’s something that’s above your skill and knowledge level, consider hiring a contractor instead. Determine how much time you need to complete the project, too. Once you’ve got everything set and mapped out, then you can start working on the renovation! Prepare for Gutting the Bathroom Before you start taking apart the bathroom, it’s important to have the new materials you will be using ready. Gather all the fixtures, tile, vanity and storage pieces that you need for the project. If possible, place them in a designated area so they are easily accessible later on. Additionally, prepare for gutting by protecting adjacent rooms (if any) with plastic sheeting or tarps to keep dust out of other areas in the house. Finally, make sure any furniture or appliances in close proximity are well covered! Choose Flooring and Walls After you have prepared for the renovation, it’s time to choose your materials. Select a type of flooring that is easy to keep clean and maintain over time. Common choices are tile and laminate, as well as vinyl or cork plank. Additionally, pick a color scheme and material for the walls that will best complement the new fixtures and storage pieces. When selecting wall coverings, consider if they need to be waterproof or if you want them to have textural elements like shiny tiles or glittery wallpaper. Install Fixtures and Fittings Next comes the most exciting part of any renovation – installation! Get ready to bring your bathroom vision to life and start installing fixtures and fittings. Install the vanity, toilet and shower/bath, along with any other pieces you may have purchased. Make sure that plumbing is connected in all these places, as well as in the sink. Once everything is in place, it’s time to seal areas like joints and pipe connections with an appropriate adhesive or caulk. Finishing Touches and Clean Up All that’s left to do now is to complete the job with those cosmetic finishing touches, such as tiles and grout, paint, fixtures, and any trim. Then you can enjoy the transformation of your bathroom! Before taking your newly renovated bathroom for a spin, make sure to give it a good clean-up and put away all remodeling equipment, materials, and tools that have been used. To renovate a bathroom don’t hesitate to contact us or call us at 613-727-9427 today.
15 Things to Do Before Starting Any Home Renovation

Planning a home renovation can be an exciting time. After all, who doesn’t love the idea of coming home to a brand-new kitchen or bathroom? But before you start tearing down walls and selecting fixtures, there are a few things you need to do to set yourself up for success. Here are 15 things to do before any home renovation. 1: Set a Budget One of the first things you need to do before starting any home renovation is to set a budget. This will help you determine what projects you can realistically afford to take on and also help keep costs under control during the renovation process. When setting your budget, be sure to account for both the cost of materials and labor. 2: Choose the Right Contractor If you’re planning on doing any major renovations, chances are you’re going to need some help from a professional contractor. Choosing the right contractor is crucial to ensuring that your renovation goes smoothly. Be sure to get multiple bids from different contractors and ask each one for references from previous clients. Once you’ve narrowed down your options, be sure to have a detailed contract in place that outlines the scope of work and sets expectations for both parties. 3: Get Your Permits Depending on the nature and scope of your renovation, you may need to obtain one or more permits from your local municipality before work can begin. Failure to do so could result in costly fines or even stop your renovation in its tracks. If you’re unsure whether or not you need a permit, your contractor should be able to advise you. 4: Prepare Your Home Once you’ve chosen your contractor and obtained all the necessary permits, it’s time to start preparing your home for the renovation process. This typically includes moves such as clearing out closets and removing carpeting or other flooring. It’s also important to make sure that any furniture or valuables that will remain in the house during the renovation are properly protected from dust and debris. 5: Pick Out Materials One of the most exciting parts of any home renovation is picking out materials such as flooring, fixtures, cabinets, etc. But before you head out to your local home improvement store, it’s important to do your research and select materials that fit both your budget and style preferences. Once you’ve got an idea of what you want, be sure to get samples so that you can see how they look in person before making any final decisions. 6: Know Your End Goal Before starting your renovation project, you need to have a clear end goal. For example, are you renovating to raise the resale value of your home, or do you plan on staying put for many years to come? Are your renovations for comfort above all else, or do you want to add more functionality? (i.e., adding more space to your kitchen or reimagining your basement into a guest bedroom suite). It’s imperative to know precisely what you want before you get started. Also, take the condition of your neighborhood into account, as that will help you determine which renovations are appropriate and which would be overdoing it for the area. 7: Ask for References If you’re selecting a contractor to handle your home renovations, don’t be shy about asking them for references. A reliable contractor will have no issue with providing references as well as a copy of their liability insurance. If they refuse your request, that’s a sign that they aren’t trustworthy. Besides asking for references, you should also look up customer reviews for their business on third-party websites. The last thing you want is to wind up with a general contractor that does shoddy work or doesn’t have insurance, so make sure you do your research. 8: Pack Up Your Things It’s best to declutter the renovation space to ensure your renovations go off without a hitch. Make a pass through the area and pack up anything that’s in the way. For instance, if you’re renovating your kitchen, pack up all your cooking utensils, silverware, spatulas, as well as any appliances that may be in the way. Also, check for any wires sticking out that may serve as trip hazards and tuck them out of the way. Your contractors will definitely appreciate being able to work in a clean, decluttered space. That also reduces the risk of trips and falls, so packing up is a must. 9: Audit Your Personal Belongings For insurance purposes, it’s wise to audit your personal belongings before the renovation process begins. It serves as a way to protect yourself should anything get broken or misplaced during renovations. Beyond that, it’s always good to have a list of your valued items on hand should anything happen, whether it’s related to your renovations or not. Creating a list of all your belongings will also make the renovation space easier to clear out. When taking inventory, decide if there’s anything that you want to get rid of to add more space. Doing so will make the renovation space nice and tidy while helping you get rid of unwanted junk, so it’s a win-win. 10: Consider Your Pets When undergoing renovations, it’s crucial not to forget about your pets. If they’re going to stay home while the work is getting done, consider their needs. Dogs and cats may find the experience stressful, or they may want to bother the new visitors to your home. That’s why it’s a good idea to have a friend or family member pet-sit for you while the renovations are underway. You can also designate an area of the home where you’ll keep your pets, such as a bedroom or the basement. To ensure they aren’t stressed, have one of your family members stay in the room with them. 11: Designate a Home Base Home renovations can sometimes be chaotic due to the loss of a key room (and function) in your home. For example, kitchen
Water Damage in Ottawa? Your Essential Guide to Repair

Did your home incur significant water damage in Ottawa? If so, it’s crucial to act fast – as wet surfaces and materials start to form mold and other severe issues after only 24 hours. As such, you’ll want to assess your damages and begin repairs as soon as possible. If the damage is severe and beyond your scope, don’t hesitate to call our highly trained and experienced team at 613-727-9427, and we’ll hop on your repairs immediately. If the damage is minimal, you may want to know if you can handle the repairs yourself. In that case, you’ve come to the right place – as we’ve prepared an extensive guide to repair water damage in Ottawa. Even if you haven’t experienced water damage in your home, it’s still beneficial to know how to deal with it properly should it occur. There’s quite a bit to know about water damage, and making the wrong move could spell disaster. Conversely, making the right decisions early on will go a long way toward restoring your home to its original state at a reasonable cost. Read on to learn the best practices involved with proper water damage repair. Along the way, we’ll cover: The three different types of water damage Mold inspection tips How to dry everything out What to throw away and what’s safe to keep Restoring and replacing drywall and siding Painting and caulking Knowing when to hire professionals Without further ado, here’s everything you need to know about repairing water damage in Ottawa. Is it Clean, Gray, or Black Water? The Three Types of Water Damage First things first, you need to determine which type of water has contaminated your home. If that sentence makes you scratch your head, you should know that not all water damage is the same. In particular, there are three types of water damage, each with varying degrees of severity. We didn’t just make this up, either. These are official rankings from the Institute of Inspection, Cleaning, and Restoration Certification (IICRC). They are: Clean water Gray water Black water Each has unique requirements for how you approach repairs, so let’s take a closer look at them. Dealing with Clean Water Damage The first and most accessible type of water damage to repair is from clean water – which is the least severe of the three, according to the IICRC. While it may seem nonsensical to refer to water flooding your home as ‘clean,’ it’s more about it being free of raw sewage and toxins, which will wreak even more havoc on your home and belongings. Clean water comes from: Busted pipes Sinks Bathtubs Water supply lines Rain As you can see, these are all ‘clean’ sources of water that don’t contain excessive toxins or raw sewage. As such, this type of water is the easiest to dry up and repair without causing too much lasting damage. If you have clean water damage in Ottawa, you should be able to repair it by yourself relatively quickly. Of course, it will also depend on how much clean water damage your home has incurred. Repairs should be straightforward and pain-free if there’s only an inch or two of water on the ground. Dealing with Gray Water Damage Next on the IICRC severity scale is gray water – which is water that is slightly dirty or soiled – but not excessively. Gray water has more contaminants than clean water but still lacks raw sewage and severe contaminants. Gray water comes from: Toilets Washing machines Sump pump backups Dishwashers The waste and chemicals in gray water may or may not be directly harmful to humans, but it’s crucial to thoroughly disinfect your home to ensure the contaminants don’t cause problems down the line. You may also need to wear safety gear while repairing gray water damage to protect yourself from hazardous toxins (especially if the gray water came from a sump pump backup). At this point, you can still opt to handle the repairs yourself, but we recommend that you leave it to professionals like our team at RenosGroup. That’s because we’re well versed in cleaning/removing contaminated materials from bathrooms, kitchens, and basements to ensure that we restore your home to its original glory. Dealing with Black Water Damage Black water is the most severe on the IICRC scale, and for a good reason. Black water contains raw sewage and hazardous toxins that are extremely dangerous. You should by NO MEANS attempt to repair black water damage in Ottawa by yourself. That’s because black water can cause severe health complications if you aren’t wearing the proper safety gear/taking the necessary precautions. The last thing you want is to have to contend with a life-threatening illness while your home is flooded, which is why you should ALWAYS call us at RenosGroup to repair black water damage. How do you know if your home is contaminated with black water? Here’s where black water comes from: Sewers Rising flood waters Seawater River water If your home gets flooded by a sewer overflow or rising river waters, you need to contact professionals for cleanup as soon as possible. Black water contains bacteria, human waste, and other serious contaminants – so your home will need to undergo extensive disinfecting before returning to normal. Your Repair Guide for Water Damage in Ottawa Now that you know about the three types of water damage, it’s time to learn how to repair damage from clean water and gray water. If you suspect the gray water has bacteria or contaminants in it, you should contact professionals for repairs. Yet, if it’s simply some water from a busted toilet, you should be able to handle it by yourself. Like anything else, there’s a right and wrong way to go about repairing water damage, which is why we’ve prepared this guide containing a step-by-step process for getting rid of water damage in Ottawa. Step #1: Inspect for Serious Issues Your first step should be to assess the damage as thoroughly as
An Extensive Guide to Carpentry in Ottawa

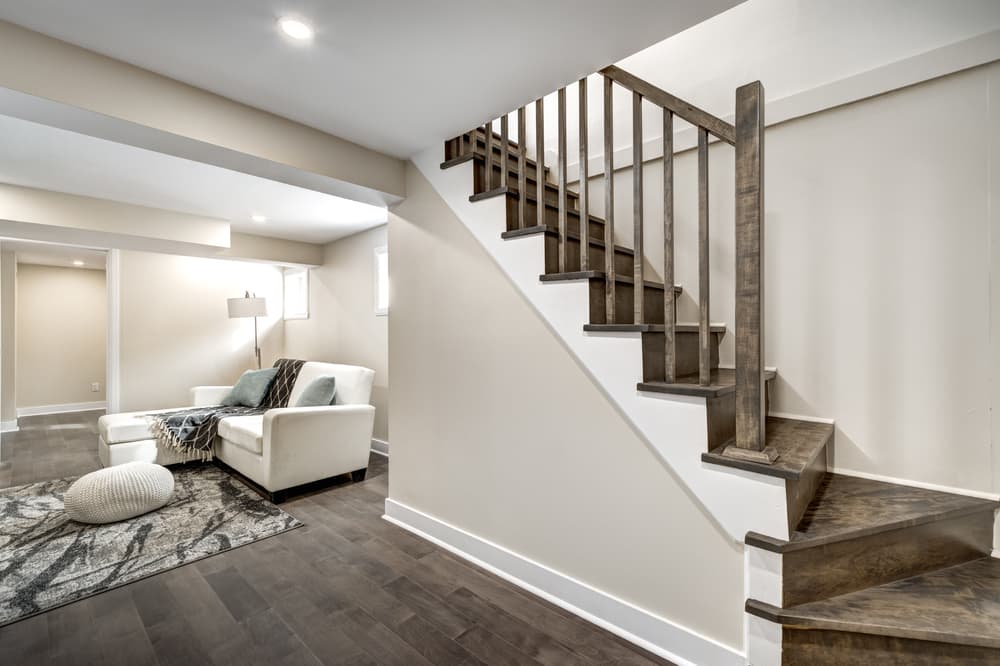
If you want to renovate your home, the chances are high you’ll need to find skilled carpentry in Ottawa. Carpenters are involved in everything from building custom cabinets to doors and window frames. If you’re seeking quality renovations, you’ll need to know a bit about the basics of carpentry. This knowledge will help you find and hire the best contractor in your area (as well as the right specialty.) It may not seem like there’s much to it. Yet, carpentry is an expansive field that’s as old as time. You’ll need to know about carpentry’s essential skills, specialties, and training. That’ll help narrow down the search when looking for a carpenter in Ottawa. If you don’t take it seriously and hire a cheap/unskilled carpenter – your results will look less than stellar. That’s why it’s worth learning more about carpentry to ensure your renovations come out looking fantastic. Finding a skilled carpenter will also help you save money in the long run since you won’t have to pay for expensive repairs to fix mistakes. Here’s an example of what we mean, does your project need a farmworker, framer, or cabinet maker? If you aren’t sure, you’ll need to do a little homework first to avoid wasting your money. Luckily, we’ve prepared this handy carpentry guide to fill you in on everything. Nailing the Basics: What is Carpentry? Let’s begin with a plain English definition of carpentry. It’s the art of working with wood to construct buildings, frames, and other objects. Woodworking and joinery also fall under the umbrella of carpentry. Here’s a breakdown of their subtle differences: Carpentry is a trade that strictly uses wood for construction. It primarily refers to the construction of buildings with timber. Woodworking is the craft side of carpentry, such as constructing cabinets and furniture. Joinery is constructing frames and panels by creating and installing fittings. There are carpenters, woodworkers, and joiners to go along with these crafts. (That’s not to mention the different specialties within each, but more on that later.) Let’s consider a few examples to make things easier to understand. In example #1, you need a professional to construct a custom nightstand for you. Would you need: A.) A carpenter B.) A woodworker C.) A joiner If you guessed B.), you’re correct. Woodworkers specialize in handcrafting furniture, cabinets, and other wooden objects. As such, if you want a custom nightstand, you need to call a talented woodworker. A joiner or a carpenter won’t have the necessary skills – unless they moonlight as a woodworker. In example #2, you need someone to construct an entire shed in your backyard. Would you need: A.) A carpenter B.) A woodworker C.) A joiner In this scenario, A.) is the correct choice. A carpenter will have the skills and wherewithal to construct the entire shed on-site. A woodworker lacks the know-how to build a building from scratch. Instead, they focus on creating objects and furniture. All right, in example #3, you need someone to build a new window frame for you. Would you need: A.) A carpenter B.) A woodworker C.) A joiner The answer is C.), as a joiner constructs frames, doors, and other joinings. They tend to work isolated in their shops and don’t work on location. By now – you should have a better understanding of the difference between the three crafts. While they’re all technically forms of carpentry – there are tiny differences – as these examples have shown. Carpentry in Ottawa – Basement Framing in Orleans The Different Types of Carpentry Within carpentry, there are various styles and specialties. In particular, there are two primary types of carpentry that we’ll focus on in this section. They are rough carpentry and finish carpentry. Here’s a detailed breakdown of both. Rough Carpentry If the carpentry work doesn’t need a brilliant finish, there’s no need to waste time and money applying one. For instance, if walls and paint hide the carpentry work – a rough job will suffice. This type of work is rough carpentry, and it’s more about doing quality work than making it look pretty. Most of the time, rough carpentry refers to structural work. Structural carpenters erect rafters, posts, and beams for a new building. With this type of work, efficiency and sturdiness are what matter most. There’s no need to make the rafters and beams aesthetically pleasing – as no one will see them. Rough carpenters find lots of work in roofing and framing new buildings. A structural carpenter puts together the skeleton of a building. They also have to pay close attention to safety codes and regulations. Remember, if you’re after a visually pleasing job, you don’t need a rough or structural carpenter. You will need one if you’re constructing a new building and need a solid foundation for it. Finish Carpentry A finish carpenter is the polar opposite of a structural carpenter. Finish carpentry is all the work that will be visible once a building gets completed. That’s why finish carpenters put a lot more effort into making their work look excellent. Finish carpenters boast great attention to detail. They install trim, molding, decks, staircases, and so much more. If you want a carpenter to build an elegant staircase with a stunning finish – you need a finish carpenter. They will go to great efforts to make their work look outstanding. For constructing a new building, you’ll need rough carpenters and finish carpenters. The rough carpenters knock out the foundation, while the finish carpenters make it look pretty. You’ll want to hire both if you’re constructing a building from scratch. Trim Carpentry Is your Ottawa home in need of a new fireplace mantle? If so, you’ll want to give a trim carpenter in Ottawa a call. They specialize in creating wood trims and moldings for homes. That includes fireplace mantles, ornamental trim, skirting boards, and so much more. Other types of carpenters may not be as familiar with installing trim, so it’s best to use a trim
Ultimate Guide to Bathroom Renovations in Ottawa
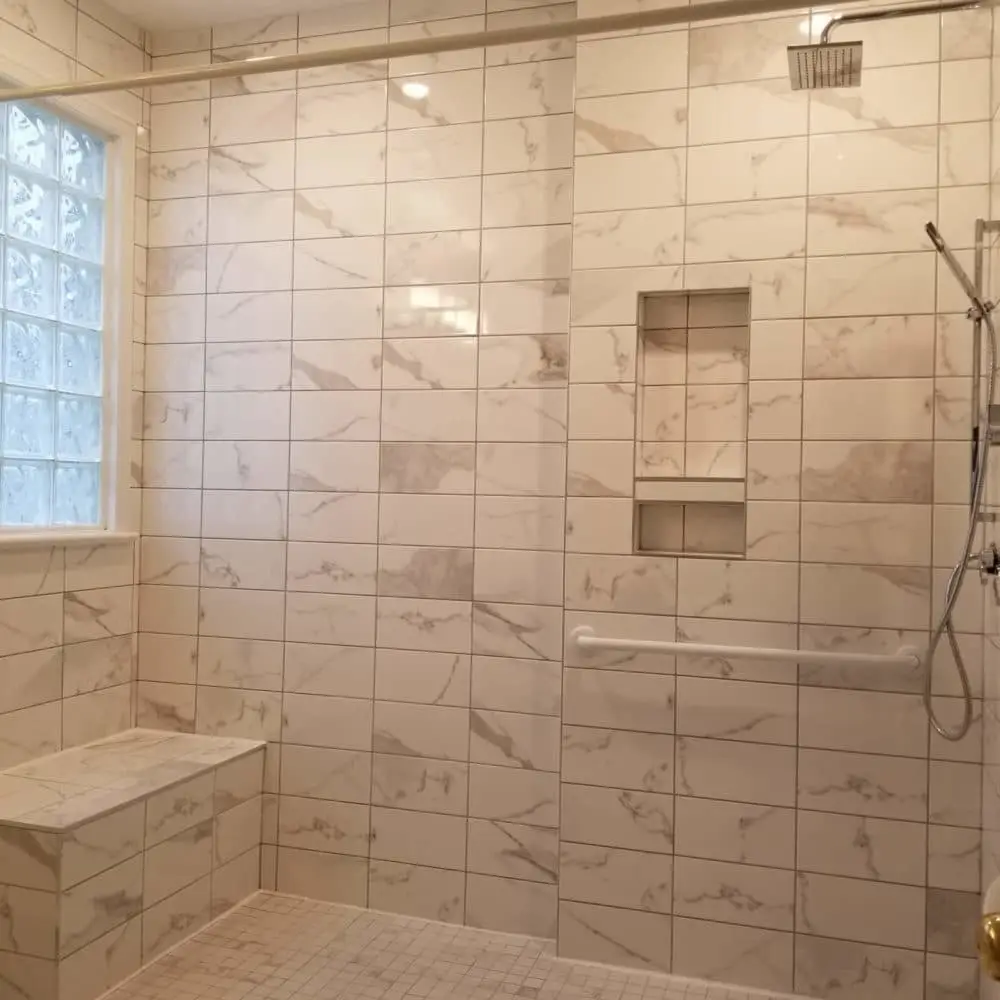
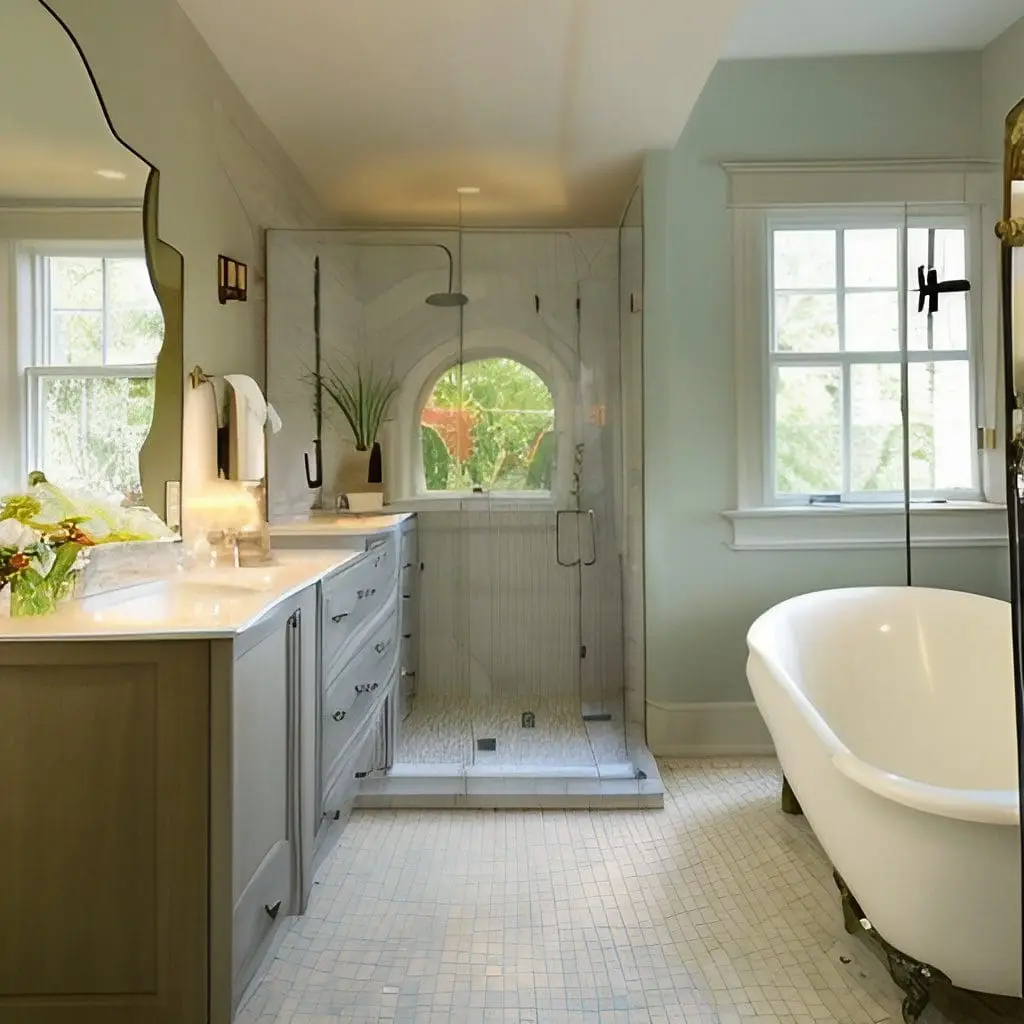
Are you thinking about renovating your bathrooms in Ottawa? Renovating a bathroom is a considerable investment, so it’s worth doing it right. That’s why we’ve created the ultimate guide to bathroom renovations in Ottawa. The last thing you want is to spend thousands on a subpar renovation that looks worse than the original. Yet, that can easily happen if you don’t know what you’re doing. That’s why it’s worth doing a little research before getting started. Luckily, we’ve compiled everything you need to know in this handy guide. Read on to learn what it takes to set up a successful bathroom renovation in Ottawa. Start with the Basics: Create a Wishlist Before you do anything, you need to determine what you want out of your bathroom renovation. You may know that you want renovations but haven’t pinpointed the exact modifications you wish to make. Now is the time to do that, and you can do so with this questionnaire: What do you not like about your bathroom the most? Which modification takes precedent over the rest? (i.e., installing a new shower to get rid of mold is more important than a new sink) Is the layout of your bathroom convenient, or could you make some changes? (i.e., new shelving or layout to make the most efficient use of space) Do you like your current color scheme, or would you like to change it? What would your dream bathroom look like? Does your bathroom have accessibility issues? (i.e., an elderly resident has trouble standing in the shower) How many people use your bathroom, and do they have enough space? Do you want a portion of your bathroom to be private? What aesthetic changes would you enjoy the most? (i.e., new tile, vanity, color scheme, etc.) These questions will help you narrow things down in terms of renovations. From there, make a list of the modifications that you want the most. That will help you during the next step, which is determining your budget. Be Realistic With Your Budget This step is easy to screw up, even if it doesn’t seem that way. You’ll want to create a realistic budget within a specific ‘sweet spot.’ You want to pay enough to get quality work done, but you don’t want to go broke in the process. At the same time, going with cheap contractors is never a good idea. Consider how much money you have available. You’ll want at least $15,000 – $20,000 available for the renovation to achieve desirable results. That’s the average price range for a single bathroom renovation, considering you don’t want to change the layout or plumbing. Once you know how much money you have, it’s time to start comparing prices for the job. Here are some tips for discovering how much your project will cost: Check out online trade shows and slideshows. Renovation companies often have trade shows/slideshows available for their products. They’re a great place to start researching how much your renovation project will cost. Try to find at least 5 to view the Ottawa area to see how much the prices differ. Flip through renovation magazines and websites. There are plenty of publications out there that list bathroom renovation products. You can use them to determine how much sinks, toilets, showers, and new tile will cost. Get quotes from contractors. Next, you’ll want to contact local contractors in Ottawa. As with the slideshow, reach out to at least five contractors and more if you can. The idea is to compare their quotes not only against each other but against your prior research. Since you’ve done some digging and know how much the components will cost – you’ll have a better idea of what contractors should charge. Taking those steps will help you find contractors that charge realistic rates. Of course, price isn’t everything when finding a contractor. You’ll also want to look closely at their reputation and past work. Try to find an online gallery containing photos of their completed projects. Also, find several websites listing reviews of their services. The ideal contractor charges fair prices and has an impeccable reputation. Plan for the Unexpected Our final budgeting tip is to leave a little wiggle room in it. Provide yourself with a 10-20% cushion just in case you run over budget. Why’s that? It’s because it’s very common to spend at least a little more than what you planned on renovations. You may find that you want to add extra fixtures and finishes during the process. You can add them without any headaches if you have that budget cushion. You’ll especially need a budget cushion if you’re making significant changes to your layout. When the contractors begin tearing down walls – they may find mold or need to do expensive drywall repairs. That’s why it’s always a good idea to add that 10-20% cushion just in case something pops up. An Overview of Bathroom Renovation Fixtures and Finishes You can do and change a lot with a bathroom renovation. Many components go into renovating a bathroom. There are various fixtures, finishes, vanities, cabinets, and more. Here’s a look at the elements you can change with a renovation. Cabinetry & Vanities (Storage Options) First, you’ll need to decide what to do with your storage. Does your bathroom have enough room to store all your toiletries and accessories? If not, you’ll want to add additional cabinetry or a vanity. A vanity should have storage areas for makeup, towels, and a mirror. Cabinetry is ideal for storing toiletries and grooming items. You can choose from framed or unframed cabinets. Also, it’s possible to hide the hardware and fixes for a more contemporary look. Next, take a look at the feasibility of your layout. Is there anything inconvenient that you want to change? An example would be that you have to walk to the other side of the bathroom to get your hair straightener. That’s an inconvenience, and renovating can remedy it. Ask your contractor to install a shelf,
How to Avoid Mold & Mildew in Your Home
Once your bathroom renovation is complete and your home looks stunning, you want to keep it looking in mint condition for as long as possible. These care and maintenance tips will extend the longevity of your bathroom renovation and help you avoid mold and mildew growth: What are Mold & Mildew? Mold and mildew are collections of small organisms (called spores) which thrive in wet and moist environments – like your bathroom. If you don’t clean your bathroom properly, mold spores start to grow and are eventually released into the air. You then inhale these spores into your lungs, which can be problematic for people with compromised immune systems or breathing conditions like asthma. Common health effects include difficulty breathing, coughing, sore throat, and headaches. Mold causes the most problems during the summertime – as it thrives in humidity. Yet, if the conditions are right, mold can wreak havoc in the winter as well. Mold and mildew will contaminate your indoor air quality. If you’ve been having trouble breathing inside – mold may be the culprit. Beyond coughing and wheezing, extreme cases can cause neurological issues and even death. That’s why every homeowner needs to take mold seriously. It’s crucial to know how mold forms and where it can pop up. That will help you prevent mold from forming in the first place, which is always the best solution. Once mold shows up, it can be challenging to get rid of entirely. What’s the Difference Between Mold and Mildew? While mold and mildew are both forms of fungi – there are subtle differences. For one, mold is a prevalent component in household dust. Mildew, on the other hand, tends to grow on flat surfaces. It appears on organic materials, such as paper, leather, wood, walls, and ceilings. The two also differ in appearance and odor. Mold tends to be black, blue, red, or green. It also has a notoriously slimy texture and can at times contain fuzz. Mildew starts off as white – distinguishing it from mold. In its later stages, it starts to turn shades of yellow and brown. Instead of slime or fuzz, it’s very powdery in texture. Both require organic material in order to form. It’s what serves as a food source for fungal growth. That’s why mold and mildew always form on materials such as wood, leather, paper, and textiles. You can tell the two apart by their smell. Mildew’s odor is pretty mild and smells musty. It’s often compared to damp laundry that hasn’t dried. Mold’s odor is a lot more pungent and powerful. That’s because as the mold continues to grow, it forms microbial volatile organic compounds or MVOCs. The final distinction is mildew forms on surfaces while mold burrows underneath. So if you see fungal growth on the surface of your cabinets, that’s a dead giveaway that it’s mildew. Mold always forms beneath the surface – inside walls and in crevices and holes. That makes mold harder to locate – which can lead to it growing out of control. The Conditions Where Mold and Mildew Thrive Any time there’s high heat, a food source (organic material), and a fair amount of humidity – mold, and mildew can form. For this reason, June through August are the most problematic months. It would be best if you kept a close eye on your walls, ceilings, and underneath sinks during these months. Yet, if you’re running your heat in the winter and there’s humidity – mold and mildew can form then, too. If temperatures are between 77° and 87°, and humidity is between 62 and 93 percent, you’re in the danger zone. Bear that in mind whenever you’re inspecting your home for mold and mildew. Here’s a list of the most common molds that show up in homes: Alternaria Aspergillus Chaetomium Cladosporium Fusarium No matter what type of mold forms in your home, they all have one thing in common – they need to go. All kinds of mold can be dangerous, which is why you need to eliminate them. The good news is there are ways to prevent mold and mildew from forming in the first place. Areas to Check for Mold & Mildew in Your Home You’ll need to know where to look for mold and mildew in your Ottawa home. Otherwise, you won’t even know that you have a mold problem. That’s the last thing you want, as out-of-control mold can do some severe damage to your home. Not only that but eliminating it will be a costly endeavor. The best thing you can do is regularly inspect your home to prevent its formation. Here are the most problematic areas you should check during hot/humid months: Your ventilation ductwork The area surrounding your HVAC system Underneath sinks Areas around sinks and faucets in bathrooms and kitchens Tubs, showers, shower curtains Any area that sees a lot of moisture (i.e., cabinets next to the shower) Dishwashers and laundry machines The areas surrounding your dishwasher In and around your refrigerator As long as you keep a close eye on these areas – you’ll prevent most mold and mildew from forming. Yet, mold can form inside of your walls and other areas that you can’t see. That’s why it’s a good idea to learn how to do mold testing for your home. Mold Prevention Tips All right, now it’s time to learn how to mold-proof your home. After all, that’s the best way to avoid all the headaches that go along with mold and mildew infestations. If you do your due diligence – you won’t have to worry about contending against mold or mildew. Here are our top tips for preventing mold and mildew from forming in your Ottawa home. Keep Your Humidity Levels Down As stated before, mold and mildew thrive in humidity. If your home or apartment is especially humid – you can bet that mold and mildew are forming somewhere. Since we know that mold and mildew love humidity – an excellent
Where to Stay During a Home Renovation in Ottawa
Are you about to undergo a major home renovation in Ottawa with us at RenosGroup? If so, you may want to find somewhere to stay during the construction temporarily. Why’s that? Because significant renovations involve lots of noise and distractions. For example, if we’re adding on to your home, you will hear lots of sawing, hammering, and drilling during the day. Of course, you can choose to stay at home during the renovation process. We’ll do our very best to keep the noise to a minimum, but sometimes that’s unavoidable. That’s why we’re here to provide you with some suggestions for temporary lodgings. It’s our goal to provide you with a seamless experience that doesn’t disrupt your routine. These lodging options will help you maintain peace and quiet while we’re hard at work on your dream home. So if you’re getting ready to hire us for a home renovation in Ottawa, stay tuned to learn where to stay while we work. Options for Temporary Housing During Renovations If you don’t feel like living in a noisy construction zone, then you need to find temporary housing. Finding comfy yet affordable lodging can help you stay sane during the day while we work. At RenosGroup, we offer the best services for home renovation Ottawa has available. Yet, it’s inevitable that renovations take time, especially ones involving construction. Let’s say that you want to add a bathroom to your basement to turn it into a guest suite. It’s a fantastic idea that will add lots of value to your basement. In order to get the job done, we’ll need to break down walls, saw, drill, hammer, and more. So if you don’t feel like turning the TV up to max to compete with the noise, here are some housing options. Short-Term Rental Apartments Is your home renovation in Ottawa going to take longer than a month? If so, then a short-term rental apartment can be your best bet. You can secure a lease for a few weeks or a few months, depending on your needs. Also, lots of short-term rental apartments come fully furnished. That can be a big time saver if you don’t feel like decorating a new place during renovations. After all, it’s only temporary housing, so having existing furniture is a huge plus. Another perk is that the apartment community will have lots of amenities. You’ll be able to get all your laundry done, as well as work out at the gym, walk your dog at the park, and more. An excellent short-term rental apartment can be a nice change of scenery and even feel like a vacation. You’ll be able to enjoy yourself while we knock out your home renovation in Ottawa. We recommend using Rental.ca to find short-term lease apartments in Ottawa. Staying with Friends and Family If you can’t afford to spend any more money on temporary housing, it’s time to call up your folks. As long as you know someone that has a spare room or couch, you should be golden. You can ask your family, friends, neighbors, and more. Friends and family come in handy when renovations present unexpected turns. Let’s say that you didn’t plan on staying outside of your home during renovations. That was until you realized that you and your family couldn’t handle the noise. Another scenario could be that we discover a gas leak or termite infestation, making your home unsafe to stay. That’s when you give your friends and family a call for an emergency place to stay during the renovations. If you don’t feel like putting anyone out or prefer to have your own space, you can use one of our other options. Try an RV or Mobile Home Is your home renovation in Ottawa going to render your home uninhabitable? Then why not make a fun camping trip out of it? You can rent a small RV to park in your backyard or across your streets. If you have water and electricity hookups from your house, then that’s even better. That way, you can hook up your plumbing and electricity in the RV. Your kids will love being able to play outside and then sleep inside of the RV. What would have been a terrible inconvenience turns into a fun adventure for the whole family. Bear in mind; you’ll need to make sure that your property allows for RVs. If not, then you can still use an RV, but you’ll need to park it elsewhere. The same is true for mobile homes. If you’re going to be out of your house for an extended period, renting a mobile home can be wise. Not only are they affordable to rent, but they grant you the freedom of mobility. During your home renovation in Ottawa, you can cruise around the city or even take an extended road trip with your friends and family. Once the upgrades are done, you can drive it back to enjoy your dream home. Find a Vacation Rental Here’s another fun option you can use to entertain your family during renovations. If you want to create a fun vacation-like atmosphere, you can turn to sites like Airbnb and www.vrbo.com/en-ca/ . These sites make it effortless to find temporary housing, even with very short notice. So if you find yourself without a place to stay, you can rely on Airbnb in a pinch. Most of these rentals will come fully furnished, which is very convenient. After all, you don’t want to pack up your entire home and take it with you on the road. Instead, the vacation rental will have everything that you need for your trip. You’ll have: Kitchenware Linens Sofas Chairs TVs Beds Nightstands Dressers More Staying in a vacation rental can be an exciting experience. If you’re going to undergo a home renovation in Ottawa, take a look at some Airbnb’s first. That way, you can determine a fun place to take your family during the renovation work. Another plus is that a lot
How to Control Pest Problems Before During and After Renovation

Home renovation is a demanding project that may include several sub-projects that will improve the appearance and functionality of your home. In order to efficiently carry out various activities within these renovation tasks, there are several prerequisites every homeowner needs to fulfill in advance. Taking care of pests, such as bugs and rodents, is one of these important works that require certain care before and throughout the renovation process. Here’s what we suggest on how to control pest problems during renovations. Removing the furniture Furniture items usually hide a lot of secrets about pests. Mice, rats, cockroaches, and water bugs like to build their nests behind pieces of furniture and inside them. When you’re making your renovation plan, you should remove the furniture first. Homeowners need to look behind every closet, armchair, and cabinet to check whether there are any hidden nests. They’re more common in houses than in apartments. So, if you live in a house, you need to be especially careful in locating and identifying insects, mice, and rats. If you don’t notice any nests or poops left by pests, it still doesn’t mean that your home is pest-free. Take a look inside all your closets and cabinets because this is where they like to live and hatch. What’s more, inspect all the wall areas that are usually behind your furniture items. If you notice any holes or damaged parts, it might be a sign that you have some unwanted tenants in your home. Installing traps and sealing holes Homeowners who realize that pests are living in their homes need to try to eliminate them before the renovation starts. For starters, you can make some eco-friendly insecticides and treat bugs, mites, and other insects on your own. In case insects have entered your closets and cabinets or woodworms have spread throughout them, think about replacing them with new pieces of furniture. If you notice that you have rodents in your home, you’ll start wondering what to do to get rid of them. For starters, you can try using some mouse traps. They might be useful if you have only a few mice around your place. However, a larger number of mice or rats is a sign that you might have a more serious problem with pests. This is where calling a reputable pest control company that specializes in mice control to help you is a smart choice. A professional rodent exterminator will cope with your rodent problem efficiently and much quicker than a DIY mice trap method, so you’ll be able to continue with your renovation works. Once you’ve treated the bugs, insects, and rodents, the next thing you should do is to double-check the walls for holes and cracks. When you’re certain that you’ve eliminated all the pests and their nests, you can seal all the cracks, holes, and other damaged parts of the walls. Inspecting neglected parts of the home Renovation is the right time to repurpose some of the parts of your home to give them a new life. Many people neglect their garages. Instead of keeping their cars or bikes in them, they use them as storage space. Whenever there’s a lot of clutter in one place, the risk of infestation is much higher. So, when you’re cleaning or transforming your garage, it’s necessary to inspect all its corners and see whether there are any signs of the presence of pests. What’s more, if there are any water inlets in the garage, clean them with some ecological solutions to make sure that any insects and rodents are eliminated from these areas. If you don’t want to use those inlets in your remodelled garage, seal them. You should apply the same procedure to any storage spaces you have inside your home. From kitchen storage compartments to workshops and the basement, inspect all the areas, eliminate pests, and seal all the potential holes and cracks through which they could sneak into your home. Keeping outdoor pests away If you decide to replace the doors and windows during the renovation process, make sure to prevent insects, flies, and other pests from entering your home. Only one door should be used for entrance/exit to the home. Protect all other empty places for doors with screeners. The entire area needs to be covered so that neither rodents nor flying insects can enter your home. If you remove all the old windows at once, close the window holes and install new windows one at a time. This will prevent flies, hornets, and wasps from entering your home and making nests inside it during the renovation. Once the renovation is finished, conduct a thorough inspection of the entire home to confirm that you’ve kept pests away from it. Conclusion If not properly controlled and eliminated pests can slow down your renovation process. That’s why you should take all the necessary precautionary measures before, during, and after renovations. Only such an approach will ensure that you enjoy yourself in a remodelled and refreshed home, free of insects, bugs, and rodents. * To learn more about pest problems during renovations, don’t hesitate to contact us, or give us a call at (613)727-9427. For pest control services please contact the author; Pestend About the author Luqman has been a pest control technician for over 20 years. He is passionate about solving people’s pest and wildlife control problems through innovative, eco-friendly and humane methods. Luqman currently works for Pestend. He believes that pest control is a science and feels that his function in his community is very important since he helps people live in peace without causing unnecessary harm to animals.
Best Lighting Fixtures for Your Kitchen Renovation

Whether you’re gearing up for a major kitchen renovation or are just looking for ways to enhance and improve the design, lighting is a key piece in any design puzzle. It plays an important role in the overall look, feel and functionality of a room. But choosing the best lighting fixtures for your kitchen can feel a bit tricky with so many options out there today. From blingy statement fixtures to cozy ambient lighting to subtle modern pendant lights – it can feel daunting when you don’t know what you want or need. To help you narrow it down and find the right one, here are some tips to guide you in selecting the best lights for your kitchen. Fixtures for Ambient Lighting The kitchen typically requires more light than other areas of the home. And the primary source usually comes from overhead ambient light fixtures. It’s important to be able to see what you’re doing when you’re cooking up a storm, which is why we recommend spending a little time calculating the amount of wattage you’ll need for your kitchen renovation. This way, when you’re shopping around for a light fixture, you can narrow down your scope and make sure you end up with the proper amount of light. Generally, for a larger kitchen, a light fixture with at least 5 light bulbs is ideal for your ambient lighting. Having a light that fills the space really makes a big difference, so make sure to pay attention to the number of bulbs. Fixtures for Task or Direct Lighting Beyond the main source of lighting, there are many other types of light fixtures that can add more character and make it easier to see during dim evenings. For example, task lighting can be helpful when you want to place direct light in certain areas. This could include light sconces to see better at night, lamps, or under-the-counter lighting to make it easier to read your cookbook or see which spices you’re adding to your new recipe. Consider these smaller fixtures for any areas where you think you’ll need more direct light. Decorative Lighting to Accent Features Similar to task lighting, accent lighting also adds more illumination, but its primary purpose is to enhance the design, highlight certain features in your kitchen, and make it feel cozy. Light installed under the counter plays into this too since it helps to highlight the backsplash. You could also add a light fixture behind one of your glass cabinet doors to show off your fancy wine glass collection, and place a few built-in ones throughout the counter area. If you want your kitchen to have a decorative look and feel, don’t skip out on accent lighting. Here are some of the most common light fixtures for your kitchen renovation: Chandeliers If you love a little decorative bling and need a light fixture overtop of your kitchen table, a chandelier is a popular choice. There are lots of different sizes and styles to consider. If you’re adding other fixtures, we suggest sticking to one particular style and theme. Pendants Pendants are smaller and won’t produce as might light. These generally have only one bulb in them, so they’re not suitable as a main overhead source of light. But they could work well to supplement another fixture. Flush Mounts For smaller kitchens that have a lower ceiling, flush mounts might work well. These are the standard light fixtures that you can find in many homes. They provide strong, diffused light. If you prefer something subtle that can blend in with the surroundings, this could be better suited to your kitchen. Determining Your Lighting Style Keep in mind that your lighting fixtures will always be on display which is why they should play into the overall theme and design of your kitchen and home. If you have a modern kitchen, it won’t make much sense to add in a light fixture that’s super busy, blingy or traditional. To make sure it will look good and cohesive, focus on other elements of your kitchen – are they predominantly metallic, simple black matte, chic and copper? Whatever the common look is, stick with that as much as possible. If most items are finished in black matte, then look for a fixture that’s similar to that style too. It doesn’t have to be the exact same, but it should complement the other features in the kitchen. Lighting seems like a simple afterthought during home renovations and remodels, but when you stop to think about it, it plays a significant role in the overall aesthetics, comfort and function of each space in your home. If you’re planning to redo your kitchen this year, get in touch with our team, or give us a call at (613) 727-9427 at the Renosgroup.ca. We can help transform your space and offer our professional recommendations to enhance your design.
8 Ideas for Your Basement Remodel
The basement was once the area of the home that was neglected and used to store old items while collecting dust. But after being stuck at home for so long during this past year, homeowners are taking stock of their unused and underappreciated space more than ever. From a dedicated home office space to a playroom for the kids to the ultimate sports and entertainment lounge, you can get creative with your basement and transform it into something you’ll love, appreciate and actually use. Here are our top ideas for your basement remodel An Extra Bedroom Whether you have a teen who needs their own space or if you have in-laws who like to come and stay with you, the basement could provide extra space for another bedroom. Being tucked away in the basement offers more privacy and comfort. Consider adding built-in shelving if you’re limited on the room you can play with and also opt for carpet to create some additional warmth in the basement. A Home Gym If you love to workout and have been missing those trips to the gym, create a home gym right in your basement. With lots of room to spare, you can fit all of the essential pieces of equipment that you desire. To make it more authentic, add full-length mirrors to the wall and make sure to choose a type of flooring that will hold up well against the machines and weights. A Wet Bar Upgrade your basement with a wet bar so you can be the hub of entertainment when the time comes! Unlike a standard bar, a wet bar includes a sink. If you don’t have the means to include this due to plumbing complications, keep it simple without the sink. If you prefer to maintain an open concept, have the bar installed right up against the wall. This way, you can fit in a table or two if you’d like to have more seating options. Include a beer tap and fridge to make it official! A Playroom for the Kids You don’t have to reserve the basement for the adults. Make it the designated kiddie zone instead. A playroom in the basement will give your kids space to have fun and run around without having to worry as much about causing too much commotion upstairs. It’ll also give you more peace and quiet when you’re trying to get work done upstairs. Sports Games and Entertainment Create your ultimate sports and entertainment area. Add comfy chairs, a large TV screen, and surround sound so you can watch your favourite team on the big screen in your own home. If your basement has the room, consider adding a pool table, foosball table or a classic pinball machine so you can have the best of both worlds with a sports and games room. Wine Collection Are you a wine connoisseur? Why not show off your collection or expand it with a section carved out in your basement just for your wine. With customized shelving, you can decorate a portion of your wall or all of them. This will give your basement that enchanting wine cellar look and feel so you can enjoy sipping on your favourite bottle whenever you please. Home Office With more people working from home these days, the basement is becoming the staple home office hub. With a few additions like carpeting, a fresh coat of paint and a modern office set up, it can be the perfect spot at home to focus and get down to business without too many distractions. Hobby & Crafts Room Getting creative often requires some personal space so you can get into the creative zone and hone in on your craft. Whether it’s painting, photography, or some other form of hobby, use your basement as your studio so you can focus and get those creative juices flowing in peace. When you’re ready to transform your basement into something practical and beautiful, contact our team at the Renosgroup. We’ve been helping homeowners throughout Ottawa remodel and renovate their homes for years. No matter what you are looking for, we can offer our expert advice and recommendations. We will help you refine your goals and vision for the project and map out the scope while working within your budget. With our experience and dedication to quality work, you can rest assured that any project we take on will be done professionally and properly from start to finish. Reach out to us today, or give us a call at (613) 727-9427 to learn more about our services, or to discuss your ideas.